Advanced Usage
Cut "Structure"
"Structure" can be cut to show partial structure, accomplished through the O Cut series nodes. For example, add the O Cut to Region node as shown below and connect it. Add any object from the scene as the "Region", and input it into the node:
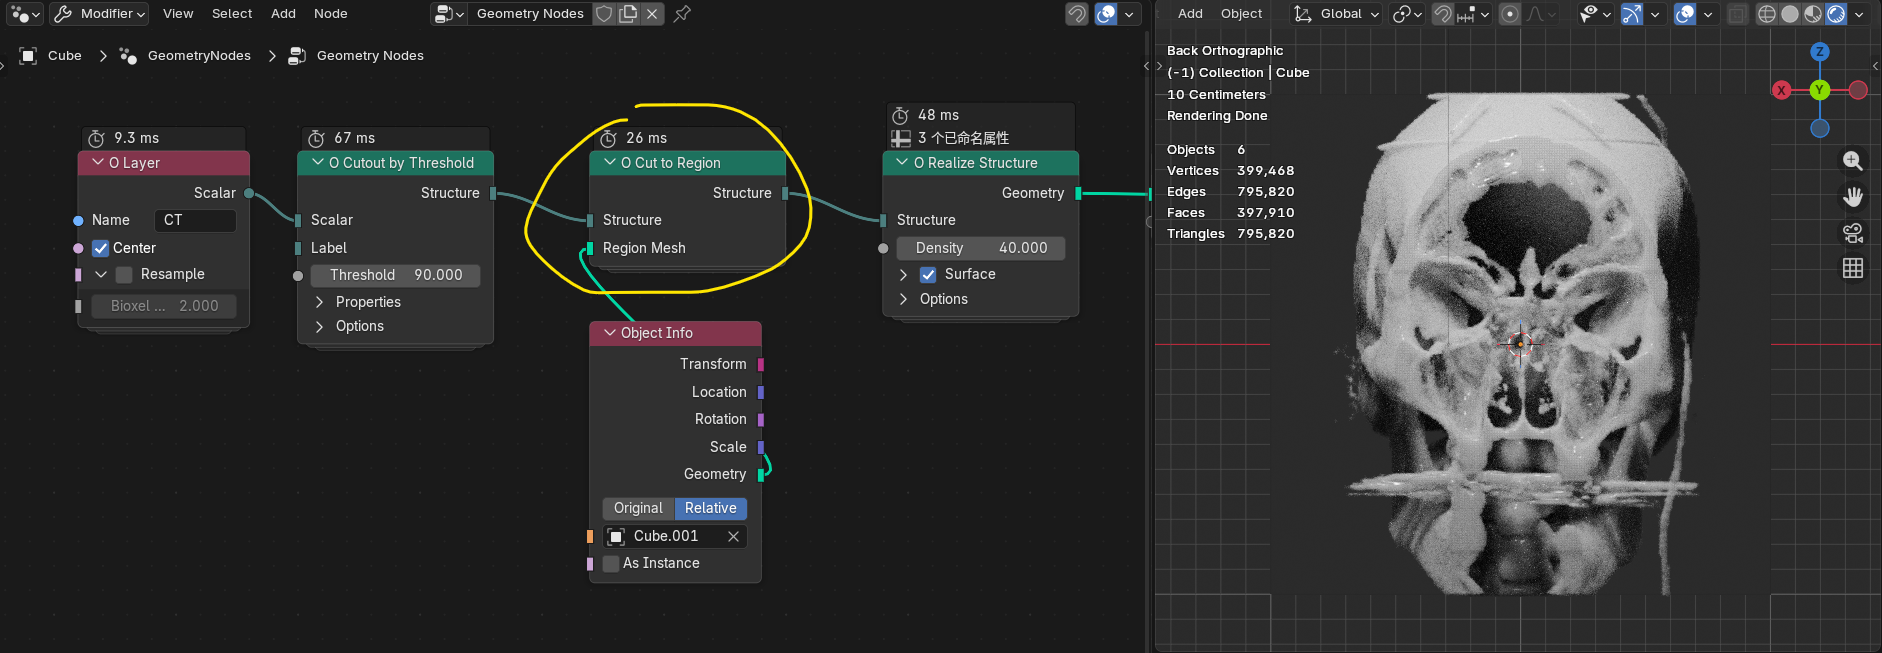
By properly adjusting the position and rotation of the "Region" object, you can see that the skull structure is confined within the region.
Note
The add-on provides a function to quickly make objects phantom. In 3D Viewport mode, right-click the "Region" object and select Bioxel Nodes > Toggle Phantom from the menu.
Warning
Cutting increases computation and affects real-time performance. Check Resample on O Layer to improve performance.
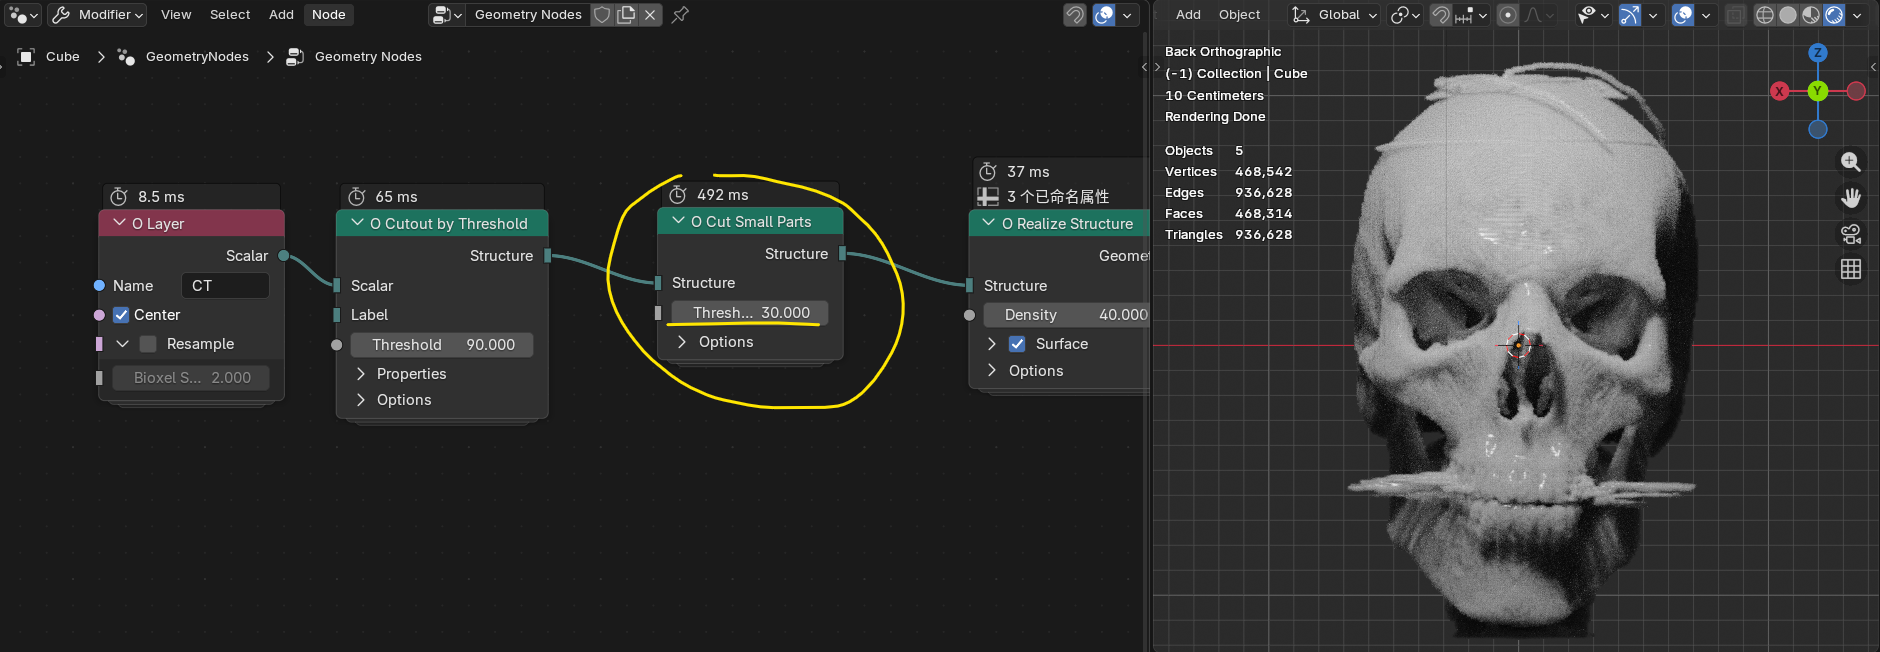
O Cut Small Parts node is a cleanup tool that quickly removes scattered fragments and keeps only clean, continuous large structures. However, the computation is particularly time-consuming, so be aware of performance.
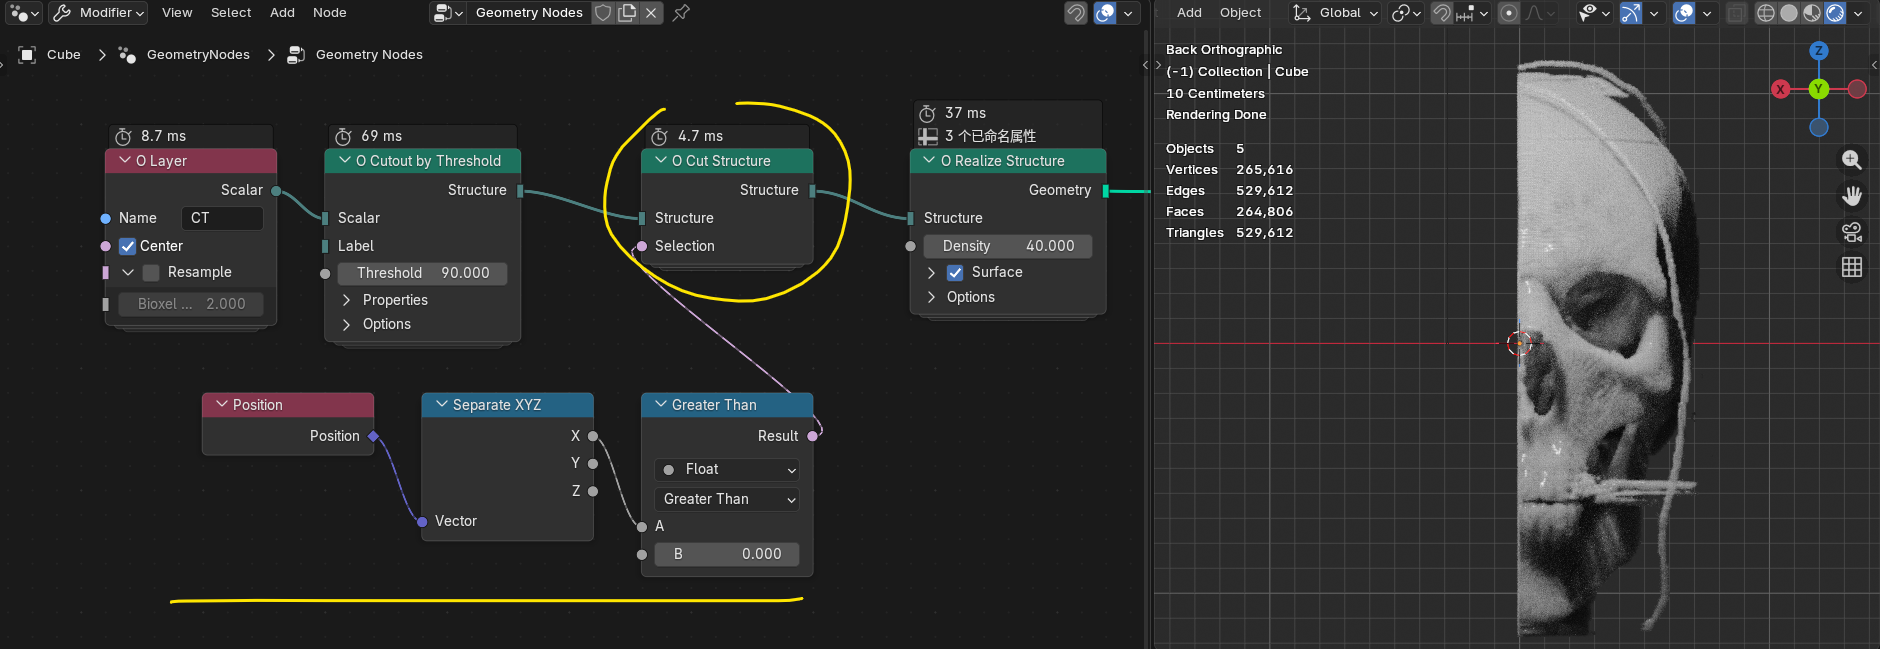
If you are familiar with geometry nodes, you can also directly define the cutting execution range through O Cut Structure. For example, in the image below, select the part where the cutting position X is greater than 0.
Structure Property Settings
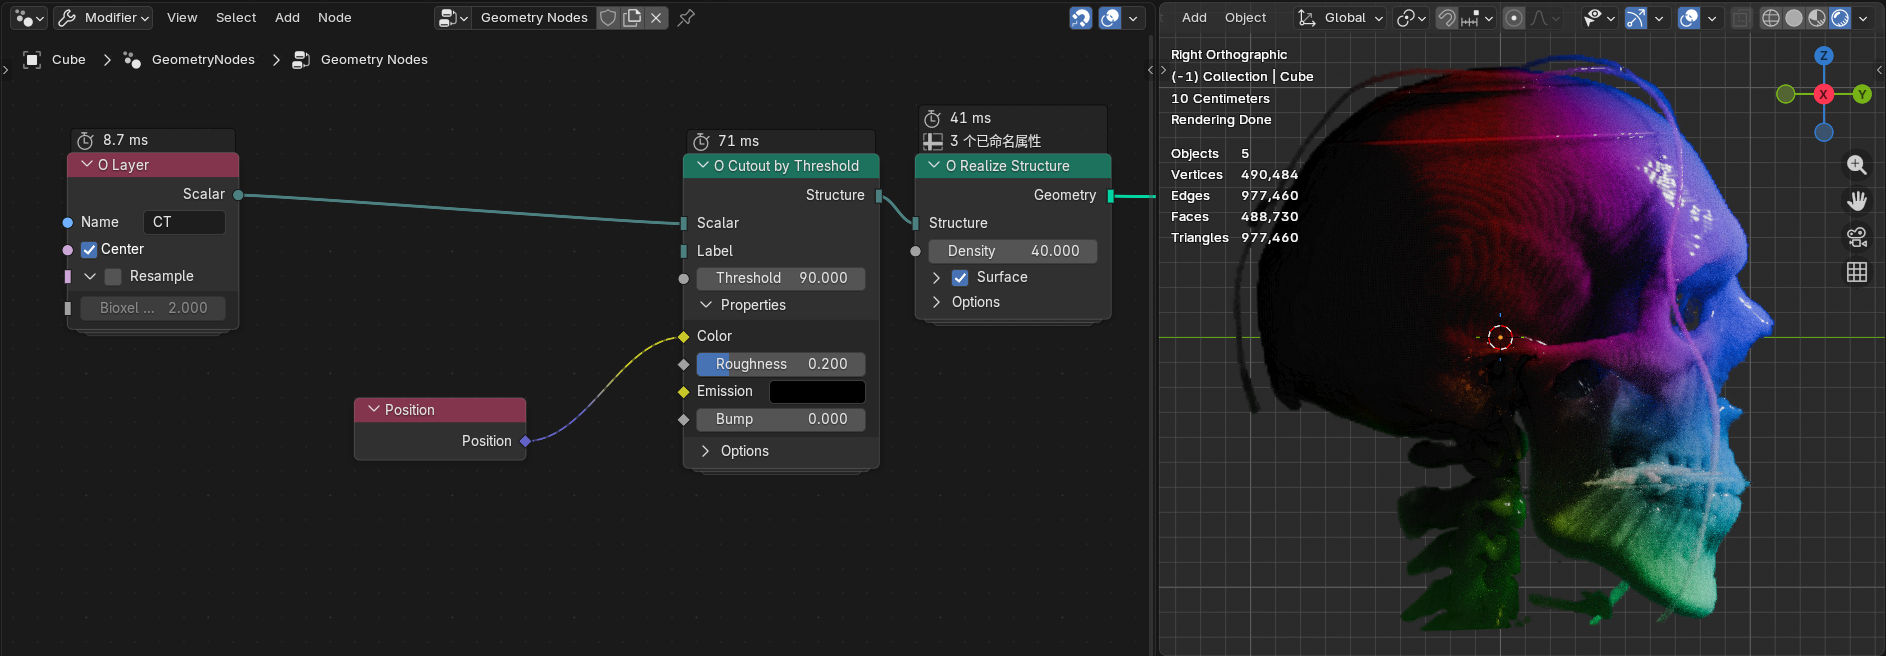
Expand the Properties of O Cutout by Threshold, where you can directly modify various property values, but they can only be set uniformly. We can use field-type data to assign differences. Take the color property as an example: for instance, connecting a Position node directly produces the effect shown below:
We can also map layer values to color gradients, which requires the O Scalar Layer to Color node (such conversion function nodes are all under Add > O Bioxel > Utilities in the node menu). Adjust as follows:
- O Cutout by Threshold: Set Threshold to 20
- O Scalar Layer to Color: Set From Min and From Max to 20 and 90 respectively
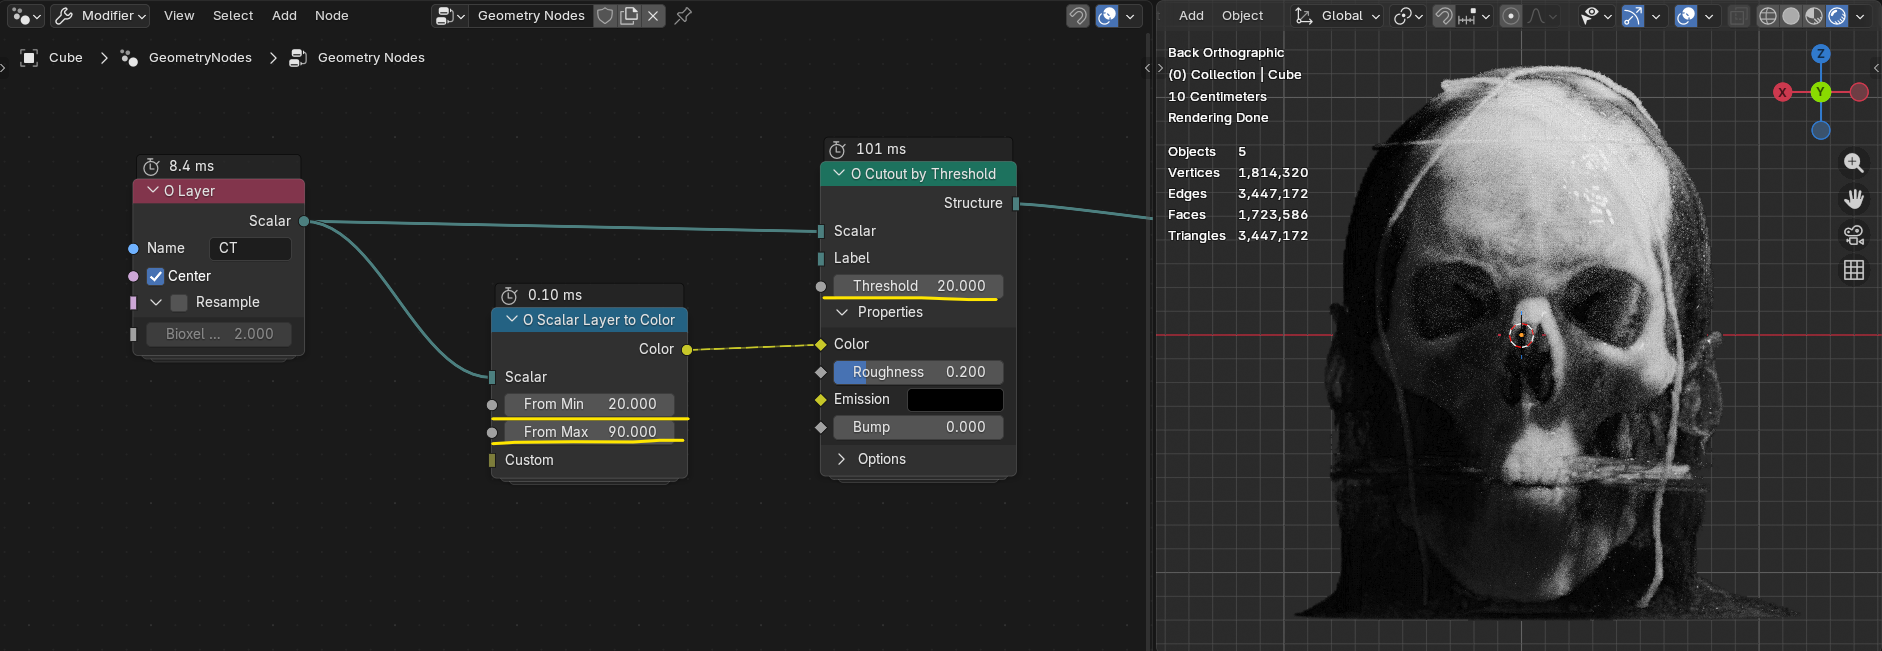
Since soft tissue CT values are lower than bone tissue, when the threshold is lowered, you can see that in addition to the skull, the attached soft tissue is also presented. The From Min and From Max of O Scalar Layer to Color define the color mapping range from 0 to 1. Therefore, low-value soft tissue appears black, and high-value bone tissue appears white.
We can also customize the mapping method through the Closure node in Blender 5.0+. For example, connect a Color Ramp node to change the black area belonging to soft tissue to dark red:
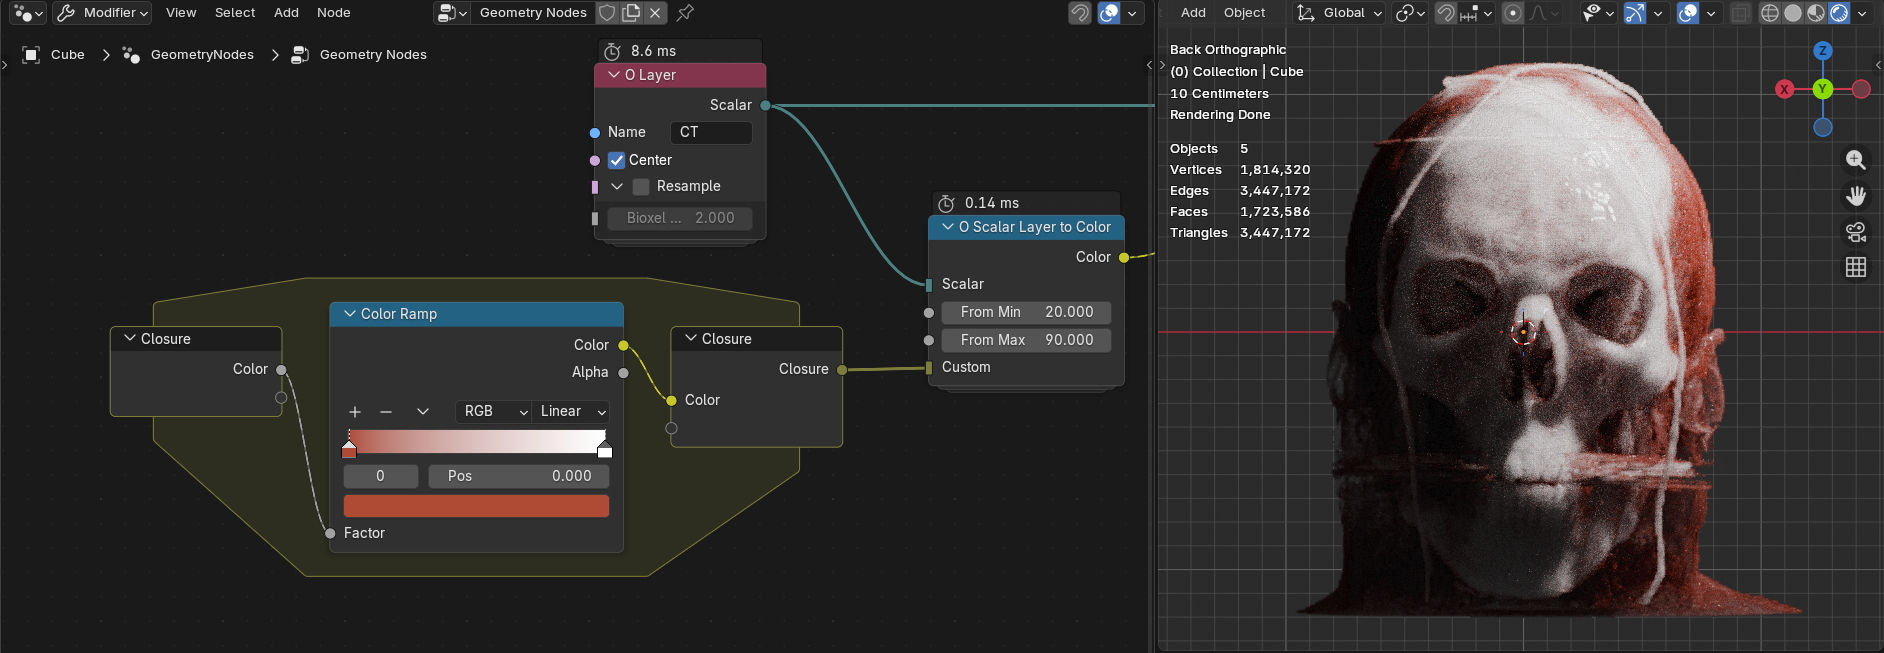
Ta-da! The anatomical rendering is done!
Other "Structure" properties can also be adjusted in this way. In addition to O Scalar Layer to Color, there is also O Scalar Layer to Factor to convert to a single value from 0 to 1.